나 편하자고 어렵게 직접 만들어 쓰는 intellij 플러그인
나 편하자고 어렵게 직접 만들어 쓰는 intellij 플러그인
-
개요
- 반복해서 생성되는 비슷한 유형의 소스코드 자동으로 생성할 수는 없을까?
-
간단하게 만들어보기
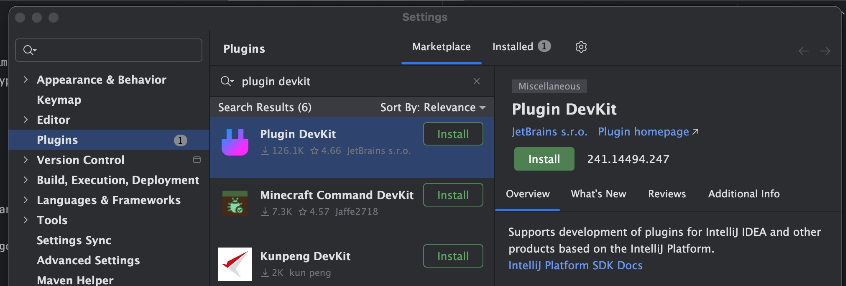
- plugin devkit 설치
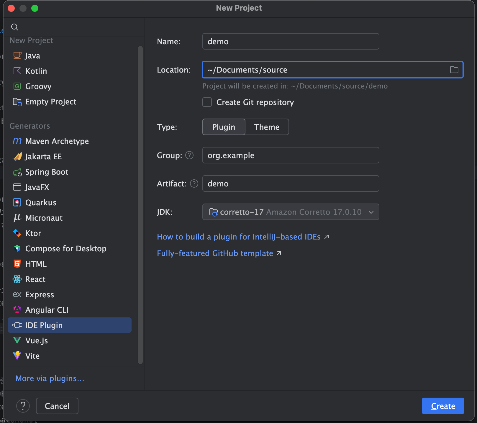
- 프로젝트 생성
- dependencies 해결될때까지 한번 둘러보기
- build.gradle.kts
- 빌드/배포 설정 파일
- type : https://plugins.jetbrains.com/docs/intellij/tools-gradle-intellij-plugin.html#intellij-extension-type
- plugin.xml
- 플러그인 구성 파일
- https://plugins.jetbrains.com/docs/intellij/plugin-configuration-file.html#additional-plugin-configuration-files
- build.gradle.kts
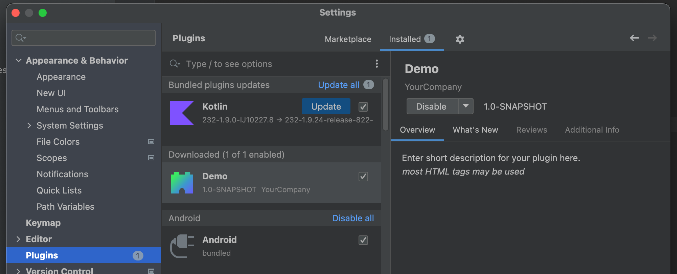
- Run Plugin 으로 바꾸고 실행해보기
- dependencies 해결될때까지 한번 둘러보기
- plugin devkit 설치
-
바로 실행해보기
-
설치된 플러그인 확인
-
메시지 창 띄워보기
-
메뉴추가
-
https://plugins.jetbrains.com/docs/intellij/grouping-action.html#binding-action-groups-to-ui-components
-
plugin.xml
<group id="top" text="HelloMenu">
<add-to-group group-id="MainMenu" anchor="last"  />
 <action id="id_Hello" class="org.example.demo.SayHello" text="Hello" description="안녕이라고 말합니다." />
</group>
-
-
액션 클래스 추가
public class SayHello extends AnAction {

   @Override
   public void actionPerformed(AnActionEvent e) {
       Project project = e.getProject();

       Messages.showMessageDialog(project, "hello hello", "hello", Messages.getInformationIcon());
  }
}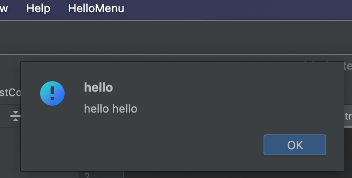
-
대화상자를 통해 액선등록이 가능하다.

-
-
-
좀더 깊게 들어가서
-
대화상자 추가
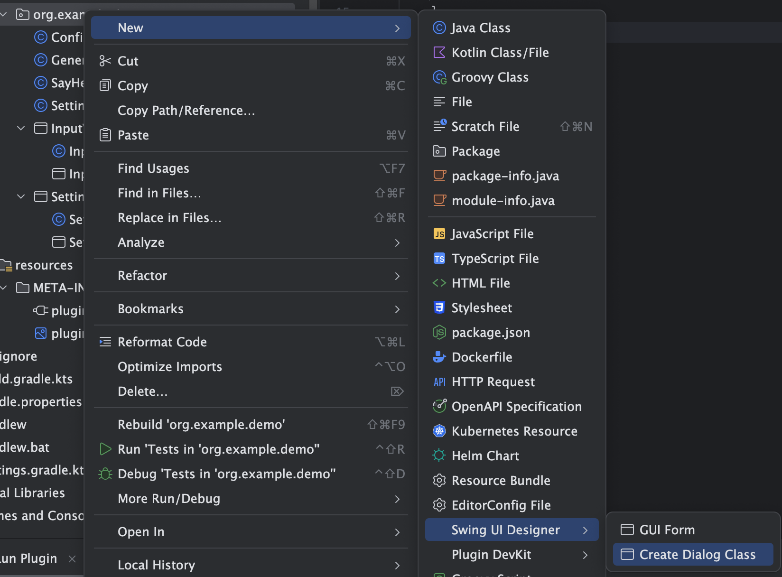
- 클래스 열어보면 main 함수에 어떻게 불러다 써야 하는지 나와있다. exit() 부분만 빼고 복사해 가져다 쓴다.
-
대화상자 꾸미기
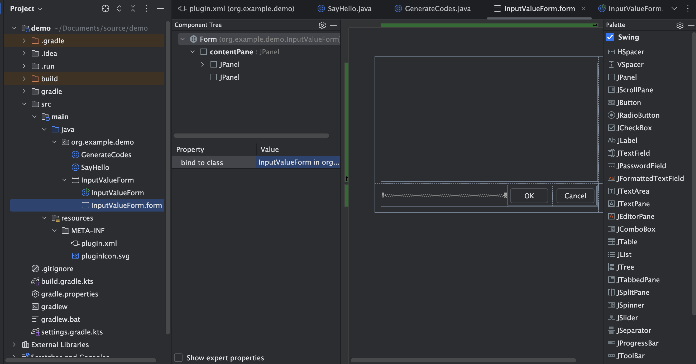
- JTable 추가
- feild name 적설하게 수정
- 가로, 세로 크기 조정
- swing 으로 검색해서 찾아봐도 된다.
- swing?
- awt -> swing
- swt -> jface
- swing?
- JTable 추가
-
context menu 에도 추가하기
<action id="context.project.generateCodes" class="org.code.generator.GenerateCodes" text="GenerateCodes"> <add-to-group group-id="ProjectViewPopupMenu" anchor="last"/> </action> -
설정기능 추가하기
<extensions defaultExtensionNs="com.intellij">
<!-- 설정 메뉴 추가 -->
<projectConfigurable instance="org.code.generator.Configuration" displayName="GenerateCodes Settings"/>
<!-- 설정 저장 -->
<applicationService serviceImplementation="org.code.generator.SettingService"/>
</extensions>
-
본기능 구현
- 가상 파일 시스템 : https://plugins.jetbrains.com/docs/intellij/virtual-file-system.html
- 바로 작성하는것이 아닌 비동기적 새로고침 작업으로 디스크에 업데이트 됨
- https://plugins.jetbrains.com/docs/intellij/working-with-text.html#safely-replacing-selected-text-in-the-document
- 가상 파일 시스템 : https://plugins.jetbrains.com/docs/intellij/virtual-file-system.html
-
-
배포 하기
-
https://plugins.jetbrains.com/docs/intellij/plugin-signing.html#signing-methods
-
인증서 생성(패스워드 기억해 놓기)
openssl genpkey\ -aes-256-cbc\ -algorithm RSA\ -out private_encrypted.pem\ -pkeyopt rsa_keygen_bits:4096 openssl rsa\ -in private_encrypted.pem\ -out private.pem openssl req\ -key private.pem\ -new\ -x509\ -days 365\ -out chain.crt ------ You are about to be asked to enter information that will be incorporated into your certificate request. What you are about to enter is what is called a Distinguished Name or a DN. There are quite a few fields but you can leave some blank For some fields there will be a default value, If you enter '.', the field will be left blank. ----- Country Name (2 letter code) [AU]:KR State or Province Name (full name) [Some-State]:gyeonggi-do Locality Name (eg, city) []:sungname Organization Name (eg, company) [Internet Widgits Pty Ltd]:NHNPAYCO Organizational Unit Name (eg, section) []:PAYCO Common Name (e.g. server FQDN or YOUR name) []:kang Email Address []:sk.kang@nhnpayco.com -
토큰만들기
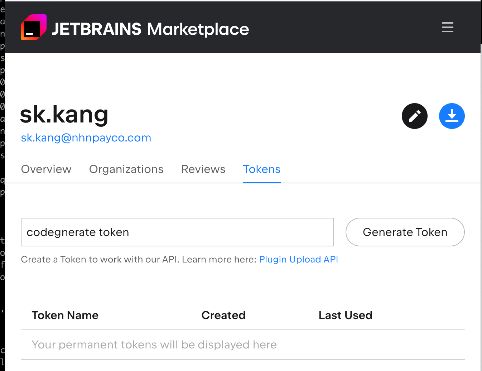
- https://plugins.jetbrains.com/author/me/tokens
-
환경변수 등록
- build.gradle.kts 내 환경변수 명으로 intellij 에 환경변수 등록
- CERTIFICATE_CHAIN : base64 인코딩돈 private_encrypted.pem 값
- PRIVATE_KEY : base64 인코딩된 private.pem 값
- PRIVATE_KEY_PASSWORD : 인증서 생성시 입력한 비밀번호 입력
- PUBLISH_TOKEN : 생성한 토큰 입력
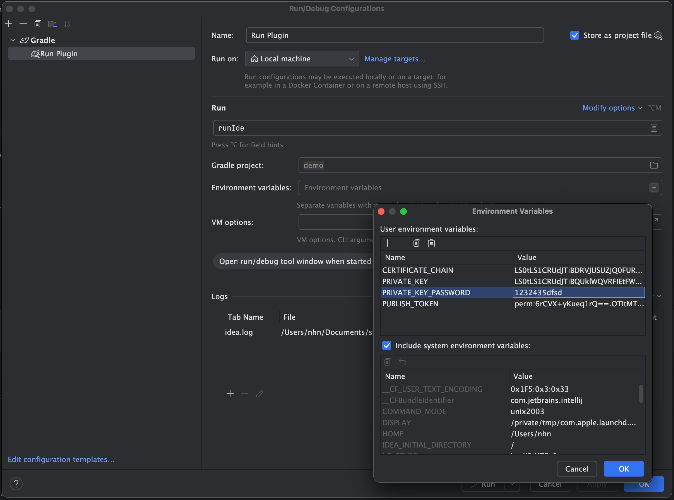
- build.gradle.kts 내 환경변수 명으로 intellij 에 환경변수 등록
-
빌드
- gradle -> intellij -> buildPlugin
- build/distrubutions/빌드파일.zip
-
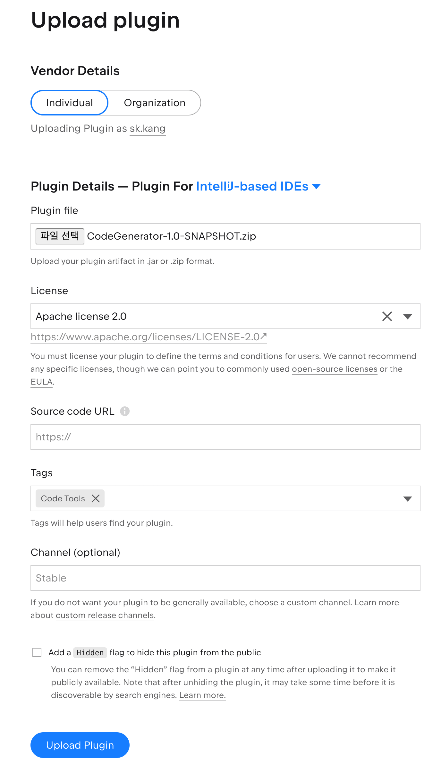
마켓 업로드
- 부가정보 입력 후 업로드
- 이후 2~3일간 심사
-
등록 완료
- https://plugins.jetbrains.com/plugin/24875-bulkcodegenerator
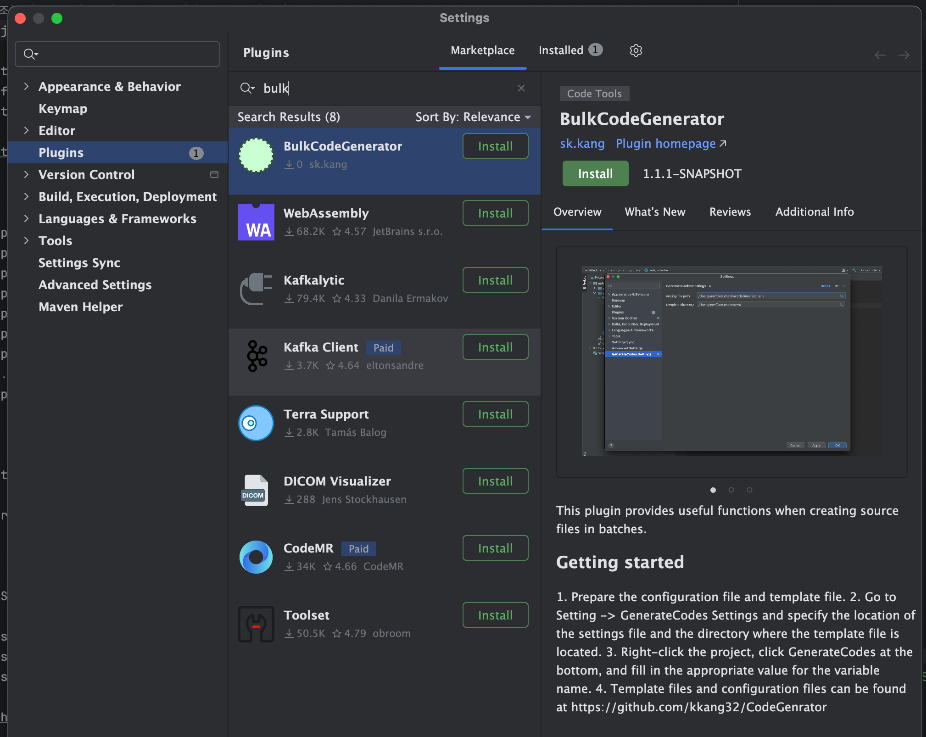
- https://plugins.jetbrains.com/plugin/24875-bulkcodegenerator
-
-
맺음말
- 참고 사이트
- sample : https://github.com/JetBrains/intellij-sdk-code-samples
- https://codingdreamtree.tistory.com/53
- https://shinsunyoung.tistory.com/75
- 참고 사이트